Best Practices and Troubleshooting Unito’s Microsoft Excel Integration
Before you start syncing information to Excel, here’s a breakdown of best practices and troubleshooting tips for this integration.
Preparing your Excel spreadsheet for a Unito flow
Section titled “Preparing your Excel spreadsheet for a Unito flow”Check that the Unito add-in for Microsoft Excel is installed
Section titled “Check that the Unito add-in for Microsoft Excel is installed”When you first add an Excel spreadsheet to a Unito flow, you’ll see this box pop up.
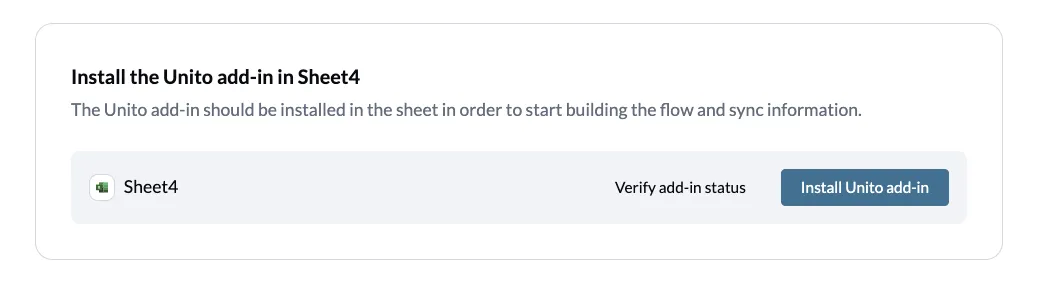
By clicking on Verify add-in status, Unito will automatically check to ensure the add-in for Excel is installed and properly configured. If it’s not, you’ll see this:
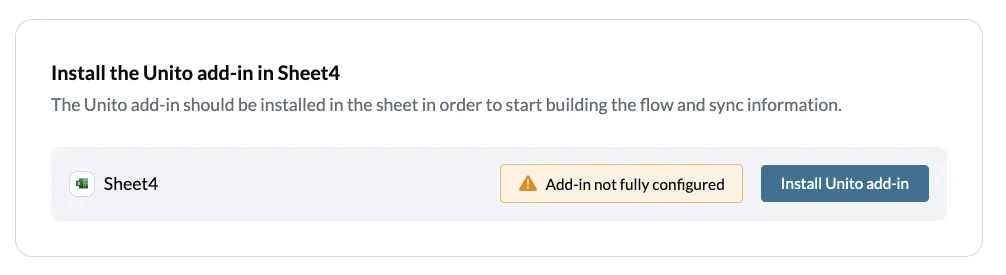
Click on Install Unito add-in, and you’ll be directed to install the add-in and ensure it’s fully configured.
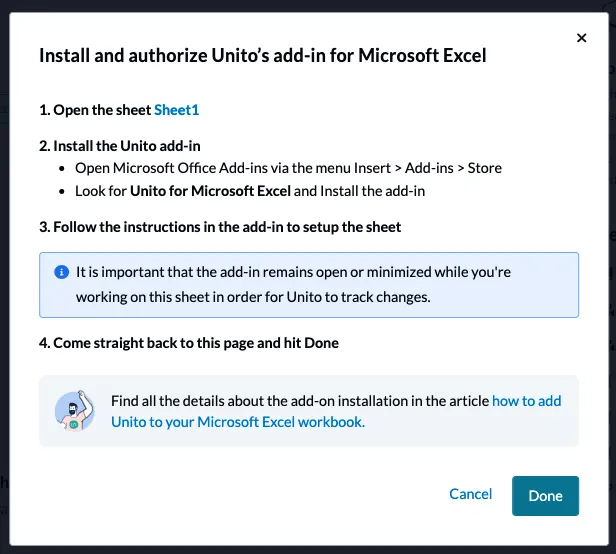
You can find more details on how to install Unito’s Excel add-in here.
Once that’s done, clicking on Verify add-in status will give you this:
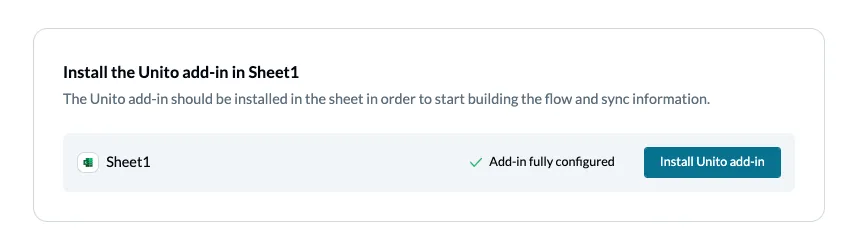
That means you’ve successfully installed the add-in and you’re ready to keep building your flow!
Use the top row as a header
Section titled “Use the top row as a header”When you create a flow with Excel, Unito will look at the top row to find the fields it needs to sync. So if you named cell A3 “Description,” you’d find a field called “Description” in Unito when it comes time to sync your information.
That means you could map the description field in a tool like Asana or Trello to this field, and that column would be automatically populated with information pulled right out of the task descriptions in these tools.
It’s a good idea to freeze the first row of your Excel spreadsheet. Otherwise, it might get moved around when you sort your data, which could break your Unito flow.
Add UnitoID and Last Modified columns
Section titled “Add UnitoID and Last Modified columns”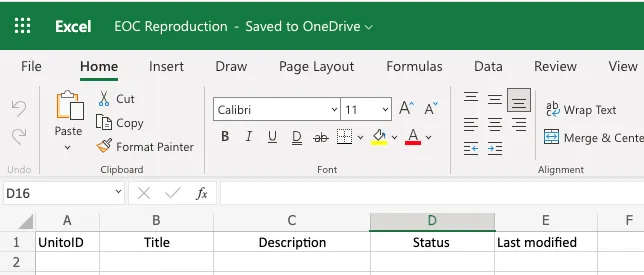
The UnitoID and Last Modified fields are essential for any Unito flow involving Microsoft Excel. Unito will only sync information found within these two columns. In the above screenshot, that means only information between the A and E columns will be synced. If you needed to add more data to your spreadsheet, you can absolutely create a new column, as long as it’s between the UnitoID and Last Modified columns.
When you install the Unito add-in for Excel, you can automatically add these columns to your spreadsheet in just a few clicks.
You can hide these columns if you want, but they do need to exist. We don’t recommend hiding them, however, otherwise someone in your workspace might accidentally delete them.
Adding your workbook to your Unito flow
Section titled “Adding your workbook to your Unito flow”Finding your Excel workbook
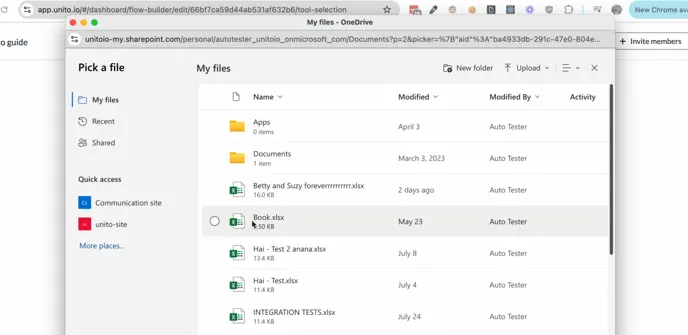
Section titled “Finding your Excel workbook”When it’s time to connect your Excel spreadsheet, all you have to do is click Select a workbook then pick the Excel workbook you want to sync.
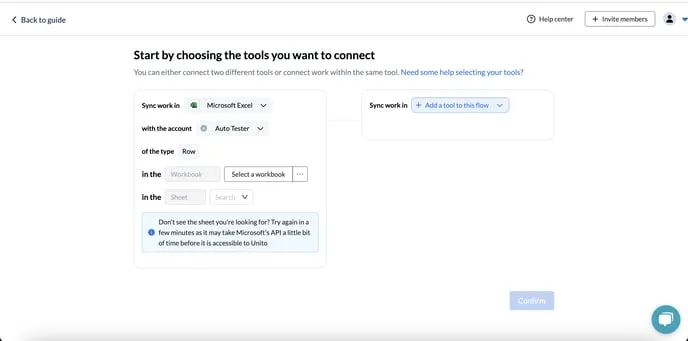
Note: Unito won’t be able to connect to files through your Quick Access folder. Instead, navigate to My Files to select the workbook.
Make sure your workbook is stored in One Drive or Sharepoint
Section titled “Make sure your workbook is stored in One Drive or Sharepoint”Unito’s connector supports Excel Online spreadsheets stored in OneDrive or SharePoint.
A limitation in Excel’s API means that workbooks and spreadsheets that use features only available in Excel Desktop can’t be synced with Unito.
Not sure if you’re using these features? Check Microsoft’s documentation here.
Resolving syncing issues
Section titled “Resolving syncing issues”Some columns are no longer syncing
Section titled “Some columns are no longer syncing”Check if the header cell for the columns that aren’t syncing still match the field mappings in your Unito flow. If these cells were updated but you didn’t change the field mappings to match these updates, Unito won’t sync any data in these columns.